This post describes the development of a ROS node that can be used to process images from an OpenMV Cam in a ROS-based robotics system.
The goal of the OpenMV Cam project was to create a low-cost, extensible, Python powered, machine vision module to become the “Arduino of Machine Vision“. The OpenMV team wanted to make machine vision algorithms more approachable to makers and hobbyists. The camera comes with software to complete common computer vision tasks like tracking colors and detecting faces while also supporting the control of I/O pins to control physical objects in the real world.
OpenMV Cam Overview
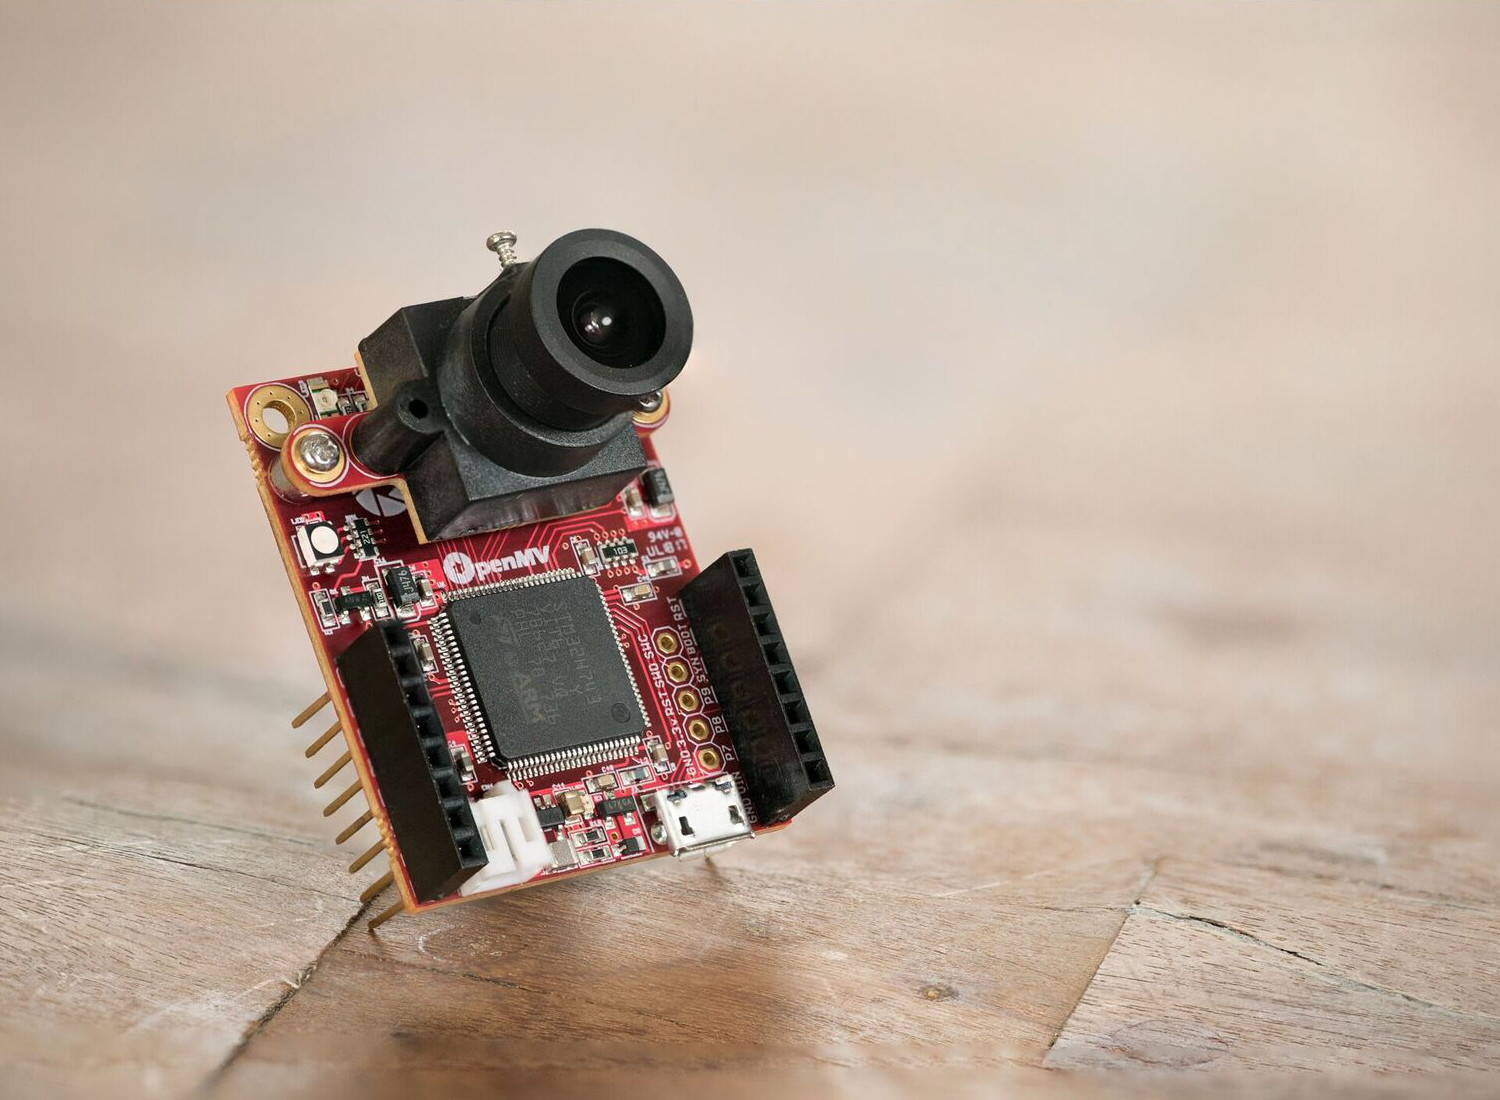
The OpenMV Cam M7 was used for this project but has since been superseded by the OpenMV Cam H7. The OpenMV Cam M7 contains the STM32F765VI ARM Cortex M7 processor running at 216 MHz with 512KB of RAM and 2 MB of flash. It also features the OV7725 image sensor which is capable of taking 640×480 8-bit Grayscale images or 640×480 16-bit RGB565 images at 60 FPS when the resolution is above 320×240 and 120 FPS when it is below.
For data transfer, we will rely on the full speed USB interface. The OpenMV Cam M7 uses less than 200mA when processing images so we can also use the USB port to power the device.
The OpenMV Cam M7 also contains a μSD Card socket capable of 100Mbs reads/writes which allows the OpenMV Cam to record video and easy pull machine vision assets off of the μSD card. The OpenMV Cam M7. The OpenMV Cam can save Grayscale or RGB565 BMP / JPG / PPM / PGM images, Grayscale or RGB565 MJPEG videos, and Grayscale or RGB565 GIF images to the attached μSD Card.
There is a small internal filesystem on the OpenMV Cam which is stored within the microcontroller’s flash memory. The filesystem will be available as a USB flash drive on your PC. You can save files to the drive, and edit `boot.py` and `main.py`.
The OpenMV Cam also has an SPI bus, I2C bus, Asynchronous Serial bus (RX / TX), a 12-bit ADC, and a 12-bit DAC.
The OpenMV Cam is built to be expandable through the addition of functional shields. These shields include an LCD screen to visualize the camera output, a WiFi shield for network connectivity, a thermal imaging shield, and a prototyping shield for custom circuit development. Additional shields are available on their product page.
The OpenMV Cam also uses the standard M12 mount so users can replace the standard 2.8mm lens with something more tailored to their application. The OpenMV Cam team sells a 4x telescopic zoom lens, an ultra-wide-angle 185° fish-eye lens, and an IR cut-filter-less lens for use with IR tracking applications.
To program the OpenMV Cam, you can use the provided OpenMV IDE which includes a text editor, a frame buffer to view the real-time image output, serial terminal for debugging, and a histogram display. Users program the OpenMV Cam with Python scripts since the system is running the [MicroPython](http://micropython.org/ “MicroPython”) operating system.

OpenMV Cam Setup
The first step is to download and install OpenMV IDE. The documentation provides platform-specific installation instructions.
Connect the OpenMV Cam to your host computer with a micro-USB cable and open OpenMV IDE. Click on the connect button which should automatically connect the OpenMV IDE to the OpenMV Cam.

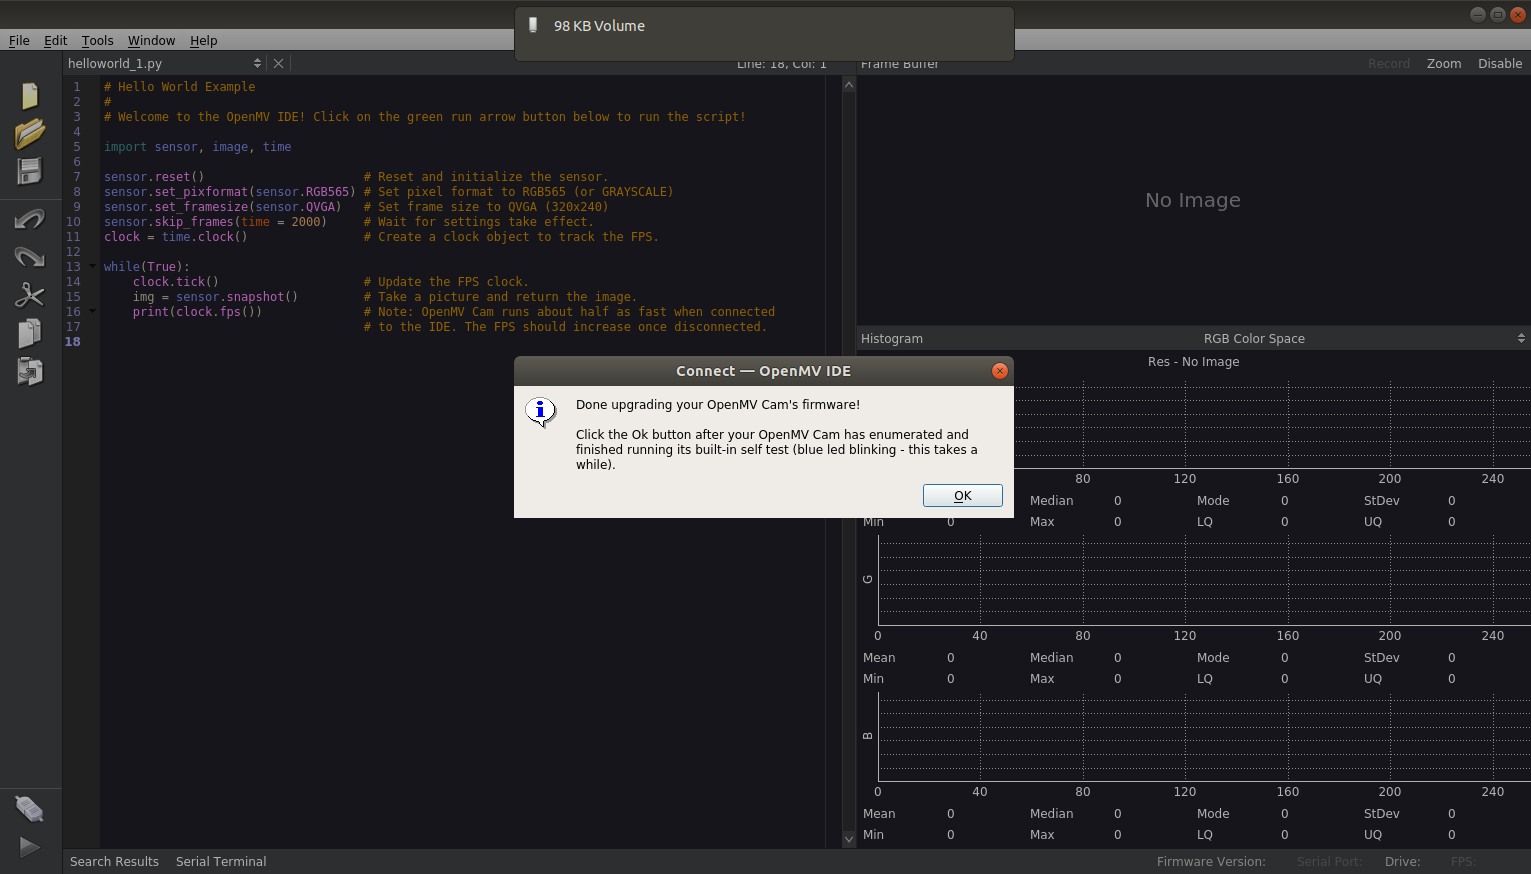
When you first connect, the firmware is likely out of date. To update your firmware please click on the Firmware Version: label on the bottom right-hand side of OpenMV IDE if it says your firmware is out-of-date. OpenMV IDE will then automatically update your OpenMV Cam’s firmware.
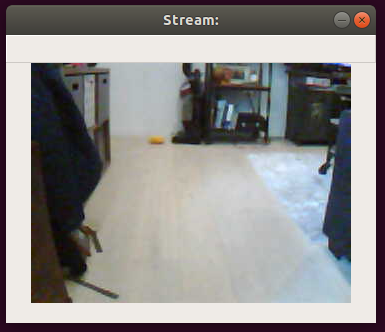
To complete a basic systems check once the firmware is updated, you can run the provided hello_world.py script. The hello_world.py script turns your OpenMV Cam into a webcam showing you the real-time image in the IDE.

If this is the first time you’ve run your OpenMV Cam the lens will be out of focus. You can use the image preview window to adjust the lens until the image is clear.
At this point, the OpenMV Cam should be ready for use.
Stream Images from the OpenMV Cam
As a first step, we will implement a udev rule that will specify a consistent name for the OpenMV Cam device, regardless of which port it is plugged into. We will use the udev rule 50-openmv.rules to detect the OpenMV Cam based on the vendor and product idea and rename the device to /dev/openmvcam. You can copy the file to the correct location with the command below:
$ sudo cp 50-openmv.rules /etc/udev/rules.d/
When the OpenMV Cam is plugged into the computer via USB, you can verify that the udev rule is properly functioning with the command below:
$ ls /dev/openmvcam
which results in the following output showing that the camera was found as the ttyACM0 device and renamed to openmvcam:
0 lrwxrwxrwx 1 root root 7 May 27 16:45 **/dev/openmvcam** -> **ttyACM0**
In order to stream images, we will use the USB_VCP class. This class allows the creation of a stream-like object representing the USB virtual comm port. It can be used to read and write data over USB to the connected host.
We will use the usb_vcp.py file to set-up the streaming. This file should be saved as main.py on the OpenMV Cam filesystem. This file starts by setting the following sensor configurations:
- Set the pixel format to RGB565
- Automatically set the gain
- Enable Advanced Auto White Balance
- Automatically set the white balance
- Automatically set the exposure
- Set frame size to QVGA (320×240)
After initialization, the code listens on the serial port for the command to capture an image, takes and compresses the image into a JPEG, and sends the image over USB to the host computer.
Once the usb_vcp.py file is loaded onto the OpenMV Cam as main.py, we can verify the streaming functionality with a simple python script. The cam_test.py is used to test this functionality.
The script first configures the serial port to communicate with the OpenMV Cam. It then enters a loop to request, read, and show the image. The script relies on the OpenCV library to decode and display the image.
The script can be run with the following command:
$ python cam_test.py
This results in the following example output:
Camera Calibration
Once the OpenMV Cam is configured and streaming images, we need to calibrate the camera. The calibration allows you to remove the distortion inherent in the camera and determine the relationship between the camera’s natural units (pixels) and the real world units (for example millimeters).
There are two primary types of distortion that OpenCV accounts for; radial and tangential. Radial distortion is visible in the form of the “fish-eye” effect. Tangential distortion occurs because the image taking lenses are not perfectly parallel to the imaging plane. OpenCV accounts for these distortions by calculating five distortion parameters.
For the translation from camera frame to world frame, the “camera matrix” is calculated which contains four unknown parameters. The unknown parameters are fx and fy (camera focal lengths) and (cx, cy) which are the optical centers expressed in pixels coordinates. For the specific equations, refer to the Camera Calibration With OpenCV page.
The calibration process determines these unknown parameters through basic geometrical equations. To compute these equations, we take images of a known pattern, specifically a checkerboard. To solve the equation you need at least a predetermined number of pattern snapshots to form a well-posed equation system. Since the images have noise, we typically take at least 10 images of the checkerboard in various positions as inputs to the calibration process. A default calibration board with a 9×6 checkerboard pattern is provided by the calibration.pdf file.
To record the input images, we can use the get_cal_images.py script. This script streams images and looks for the chessboard pattern. Specifically, the OpenCV function findChessboardCorners is used to ensure that the pattern is detected in the image. If detected, the image is saved into a calibration data folder.
$ python get_cal_images.py
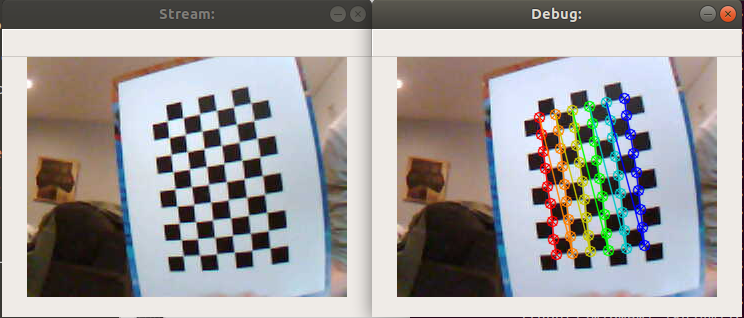
The script has one window which shows the most recent image from the camera. The second window shows the corners of the checkerboard that were found.
The calibrate.py script is used to process the calibration images and output the calibration parameters. This script also undistorts the input images, plots the detected chessboard pattern, and saves them to a directory for review.
The script uses the OpenCV calibrateCamera function to compute the calibration matrices. The numpy savez function is used to save the arrays into a single file in an uncompressed .npz format named calib.npz. The camera only needs to be calibrated once and the values can be used to undistort images on successive uses.
$ python calibrate.py --debug ./output/ --square_size 1.0 ./input/*.jpg
The script prints the calibration values that are then stored in the .npz file.
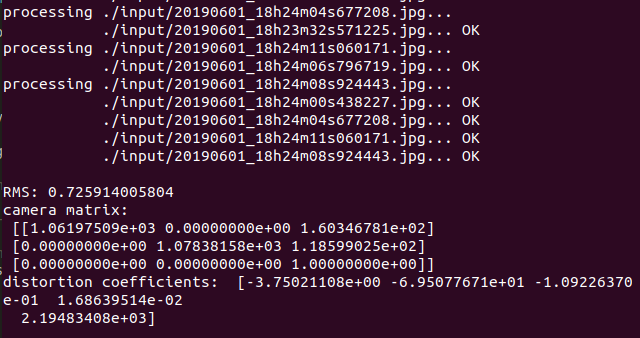
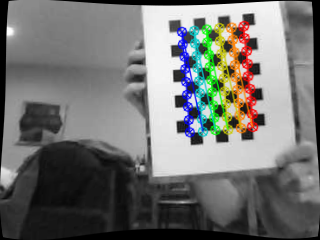
The script also prints out debug images. This includes the image with the chessboard corners overlaid as well as the undistorted image with the calibration correction applied.
For example, here is the raw input image:

The corrected image is below:
For the wide angle lens, it may be better to use the calibrate_fisheye.py scripts. This script reads in the same calibration input images of the chessboard, but uses the fisheye.calibrate() function to compute the distortion variables.
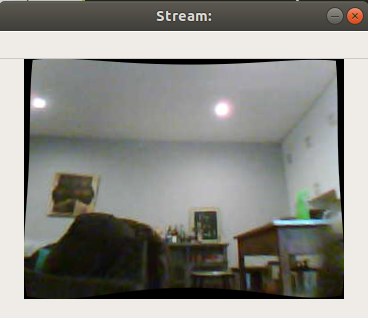
Once the calibration values are saved, you can stream images and apply the distortion correction with the cam_test.py script.
$ python cam_test.py -c 1
ROS Node Integration
In order to integrate the OpenMV Cam with ROS, we adapt the cam_test.py features and add basic ROS functionality. The ROS node is created in the openmv_cam_node.py file.
The file creates a ROS node named “Openmv_cam.” It then configures the serial ports and begins streaming messages at 10hz. The messages are published as ROS Image message types on the “/openmv_cam/image/raw” topic.
The node can be run with the provided openmv_cam.launch file. This file can be launched with the following command:
$ roslaunch openmv_cam openmv_cam.launch rviz:=true
With the RViz argument set to true, you can view the streaming output of the images from RViz as shown below.

The OpenMV Cam ROS node can then be integrated into other, more complex applications. The image below is from an OpenMV Cam mounted to an RC car.