

This post details the process of integrating the Travis-CI tool with the Ouster ROS package. Continuous Integration (CI) is a software development practice where developers integrate code into a shared repository. Each integration can then be verified by an automated build and automated tests. This automated testing allows you to quickly detect errors and locate them more easily. CI has become a best practice for software development and is guided by a set of key principles. These include revision control, build automation, and automated testing.
CI also supports the concept of Continuous Delivery which is another best practice. The goal is to continually keep your applications in a deployable state and even automatically push your application into production after each successful update. The post “OS-1 ROS Package Deployment with Docker” details the steps to integrate a ROS package on github with Dockerhub to support Continuous Delivery.
As a continuous integration platform, Travis CI supports your development process by automatically building and testing code changes, providing immediate feedback on the success of the change. Travis CI can also automate other parts of your development process by managing deployments and notifications.
When you run a build, Travis CI clones your GitHub repository into a brand new virtual environment and carries out a series of tasks to build and test your code. If one or more of those tasks fails, the build is considered broken. If none of the tasks fail, the build is considered passed, and Travis CI can deploy your code to a web server, or application host.
Writing ROS Tests
The rostest package is an extension to roslaunch that enables roslaunch files to be used as test fixtures. As a fully running system has more complex behaviors than an individual ROS node, this allows you to do full integration testing across multiple nodes.
The rostest files generally have a .test or .launch file extension. The difference between rostest and roslaunch is that rostest also processes <test> tags within your XML file. These <test> tags specify test nodes to run.
The rostest framework includes several test nodes which are useful for testing ROS nodes.
– hztest: Allows you to test the publishing rate of a node. It reads in parameters that specify the topic name, rate, and error bounds of the test, and will succeed if the topic matches that specification
– paramtest: Allows you to test if certain parameters are registered at the Parameter Server. It reads in parameters that specify the parameter name, and optionally its value, and then will succeed if the parameter matches that specification.
– publishtest: Allows you to test if specified topics are published at least once. This can be used for testing topics that are latched or those of which publish rate is uneven.
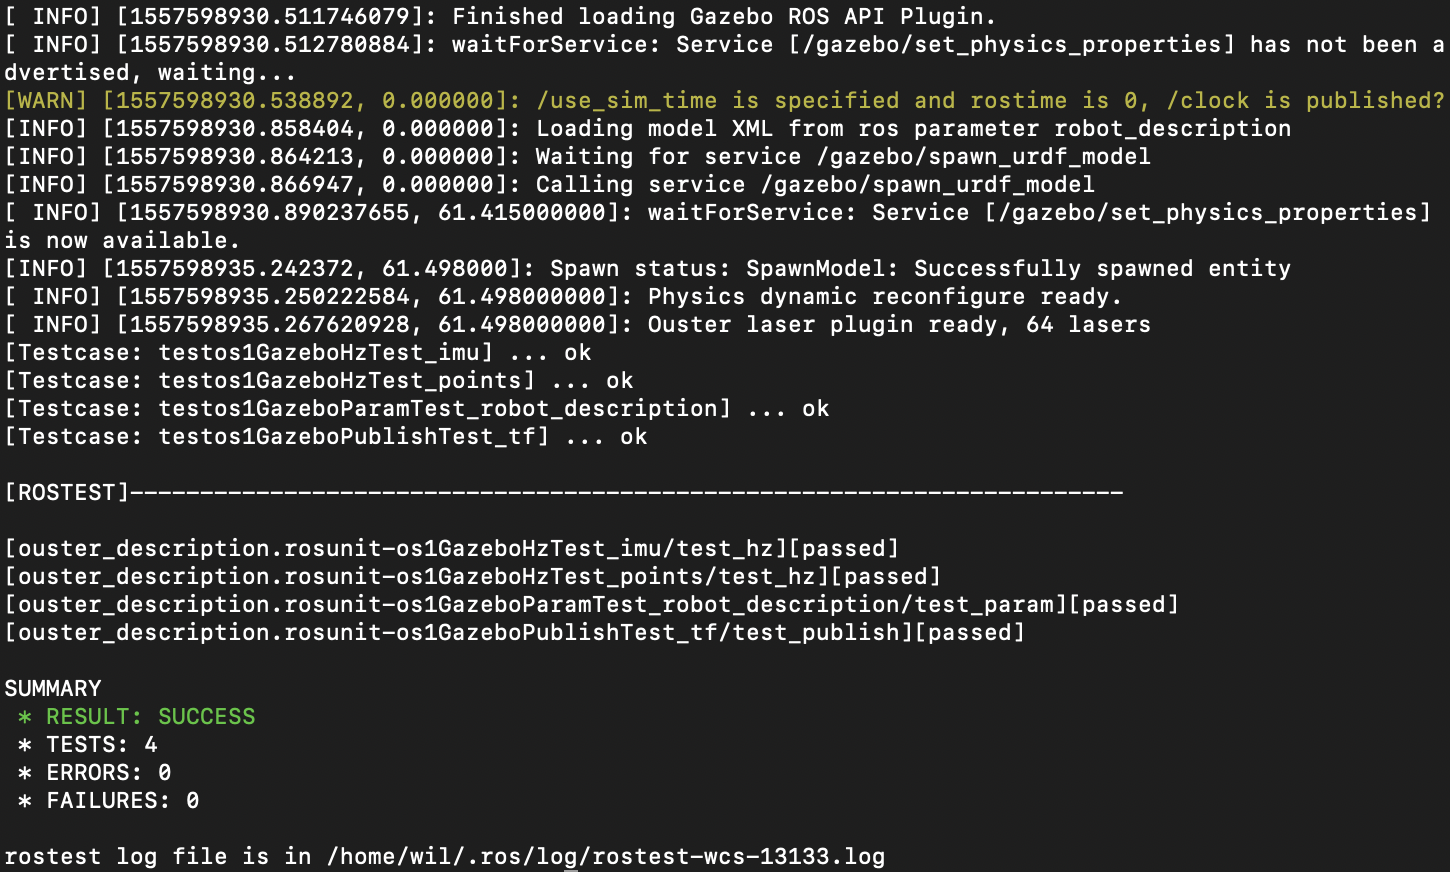
First, we want to test the OS-1 sensor simulation in Gazebo. Specifically, we want to make sure that Gazebo loads the model and plugin properly, resulting in PointCloud2 messages being published. For more information on the development, functionality, and integration of the OS-1 Gazebo sensor model, refer to the post, “Simulating an Ouster OS-1 lidar Sensor in ROS Gazebo and RViz.”
All of the package tests are placed in the tests directory. The test is written as a launch file, specifically, os1_gazebo.test. This launch file contains the following test cases:
- os1GazeboHzTest_points: Tests that the
/os1_cloud_node/pointstopic is published at 10Hz, the expected value. - os1GazeboHzTest_imu: Tests that the
/os1_cloud_node/imutopic is published at 100Hz, the expected value. - os1GazeboPublishTest_tf: Tests that the topic
/tf_staticis published at least once. - os1GazeboParamTest_robot_description: Tests that the ROS param
robot_descriptionis set.
The ouster_decription package CMakeLists.txt file is updated to run the os1_gazebo.test file if testing is enabled via the catkin commands.
The test can be run with the following command:
$ rostest ouster_description os1_gazebo.test
The test output is shown below:

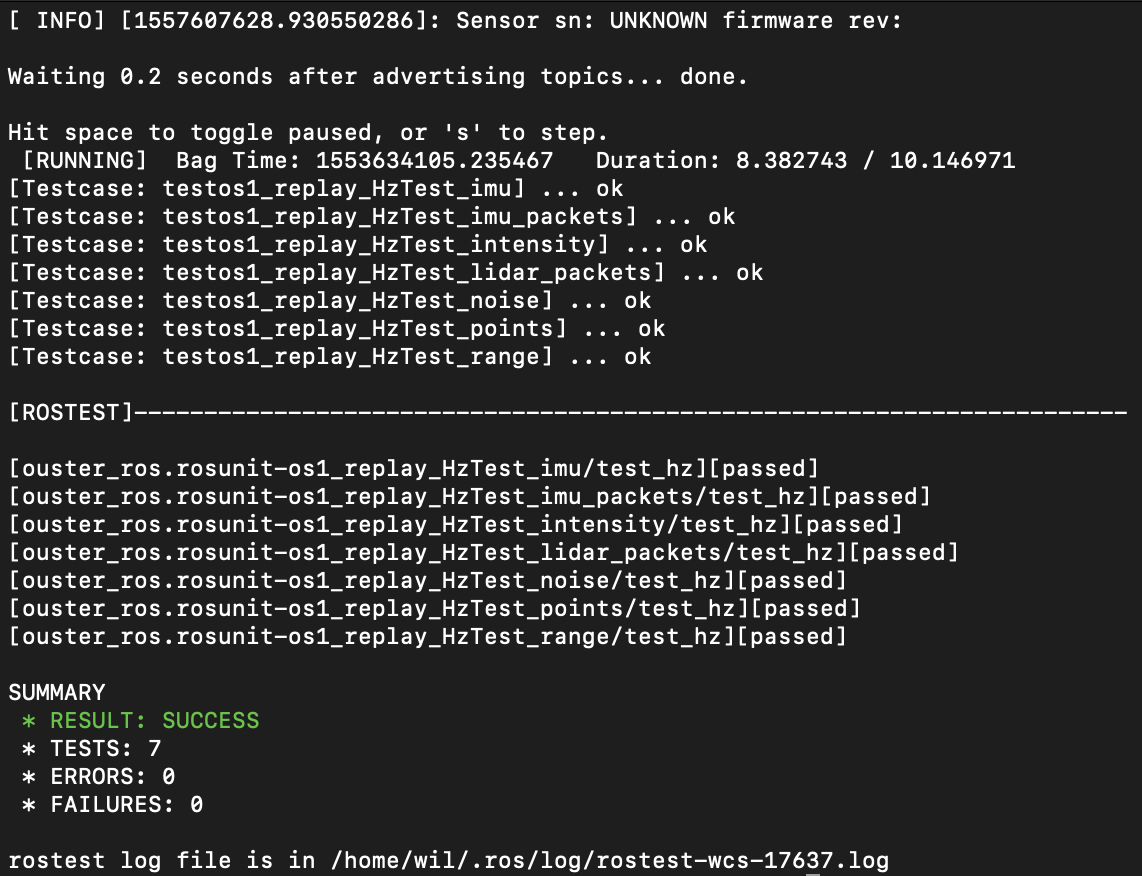
We can also test the OS-1 ROS driver to ensure proper functionality. We will use recorded data as the input to the test. When the data is replayed and the OS-1 ROS driver is run in replay mode, we can detect that the proper topics are published at the expected frequencies. The os1_replay.test test file is located in the tests folder in the ouster_ros package. Additionally, the 2018-08-29-16-46-17_0.bag file is stored in the tests directory as well.
The os1_replay.test file starts with replaying the bag data and launching the standard os1.launch file. The os1_replay.test file contains the following tests:
- os1_replay_HzTest_imu: Tests that the
/os1_cloud_node/imutopic is published at 100Hz, the expected value. - os1_replay_HzTest_imu_packets: Tests that the
/os1_node/imu_packetstopic is published at 100Hz, the expected value. - os1_replay_HzTest_lidar_packets: Tests that the
/os1_node/lidar_packetstopic is published at 640Hz, the expected value. - os1_replay_HzTest_points: Tests that the
/os1_cloud_node/pointstopic is published at 640Hz, the expected value. - os1_replay_HzTest_intensity: Tests that the
/img_node/intensity_imagetopic is published at 10Hz, the expected value. - os1_replay_HzTest_noise: Tests that the
/img_node/intensity_noisetopic is published at 10Hz, the expected value. - os1_replay_HzTest_range: Tests that the
/img_node/intensity_rangetopic is published at 10Hz, the expected value.
The test can be run with the following command:
rostest ouster_ros os1_replay.test
An example of the test results is shown below:

Configuring Travis-CI with Industrial CI
As discussed earlier, Travis-CI is a platform that automatically builds and tests code changes. This provides quick feedback on the impact of the change.
Industrial CI is a continuous integration repository for ROS-Industrial. However, non ros-industrial repositories in other organizations can utilize the CI configuration as long as they are ROS-powered. The repo provides configurations for Travis CI and Gitlab CI.
The first step is to get an account with Travis-CI and authorize access to your github. From there, you can enable Travis-CI for each repository associated with our github account. See this tutorial for more detailed information.
The next step is to add a .travis.yml file to your repository root. This template is provided by Industrial CI. The template can be modified based on the [configuration options detailed in the readme.
A Travis CI job is composed of two primary components. The install portion installs required dependencies and the script section runs the build script. There are other optional tags that can be used to run custom commands before the installation phase or after the build phase, which are described in the documentation.vIt’s also possible to specify multiple parallel jobs to be built using the build matrix.
The ouster_example .travis.yml file. All checks run on Docker to remove the limitations of Travis CI, which only supports up to Ubuntu 16.04. The file defines some global variables for the jobs and specifies building on both ROS Kinetic and ROS Melodic. The build begins with the base Docker image for each ROS distribution specified by the DOCKER_BASE_IMAGE variable. Additional required dependencies are installed via the ADDITIONAL_DEBS variable.
Once the environment is properly set up, Travis CI clones the industrial_ci git repository and runs the travis.sh script to complete the installation step. This will build and optionally test the package and report the success or failure when complete.
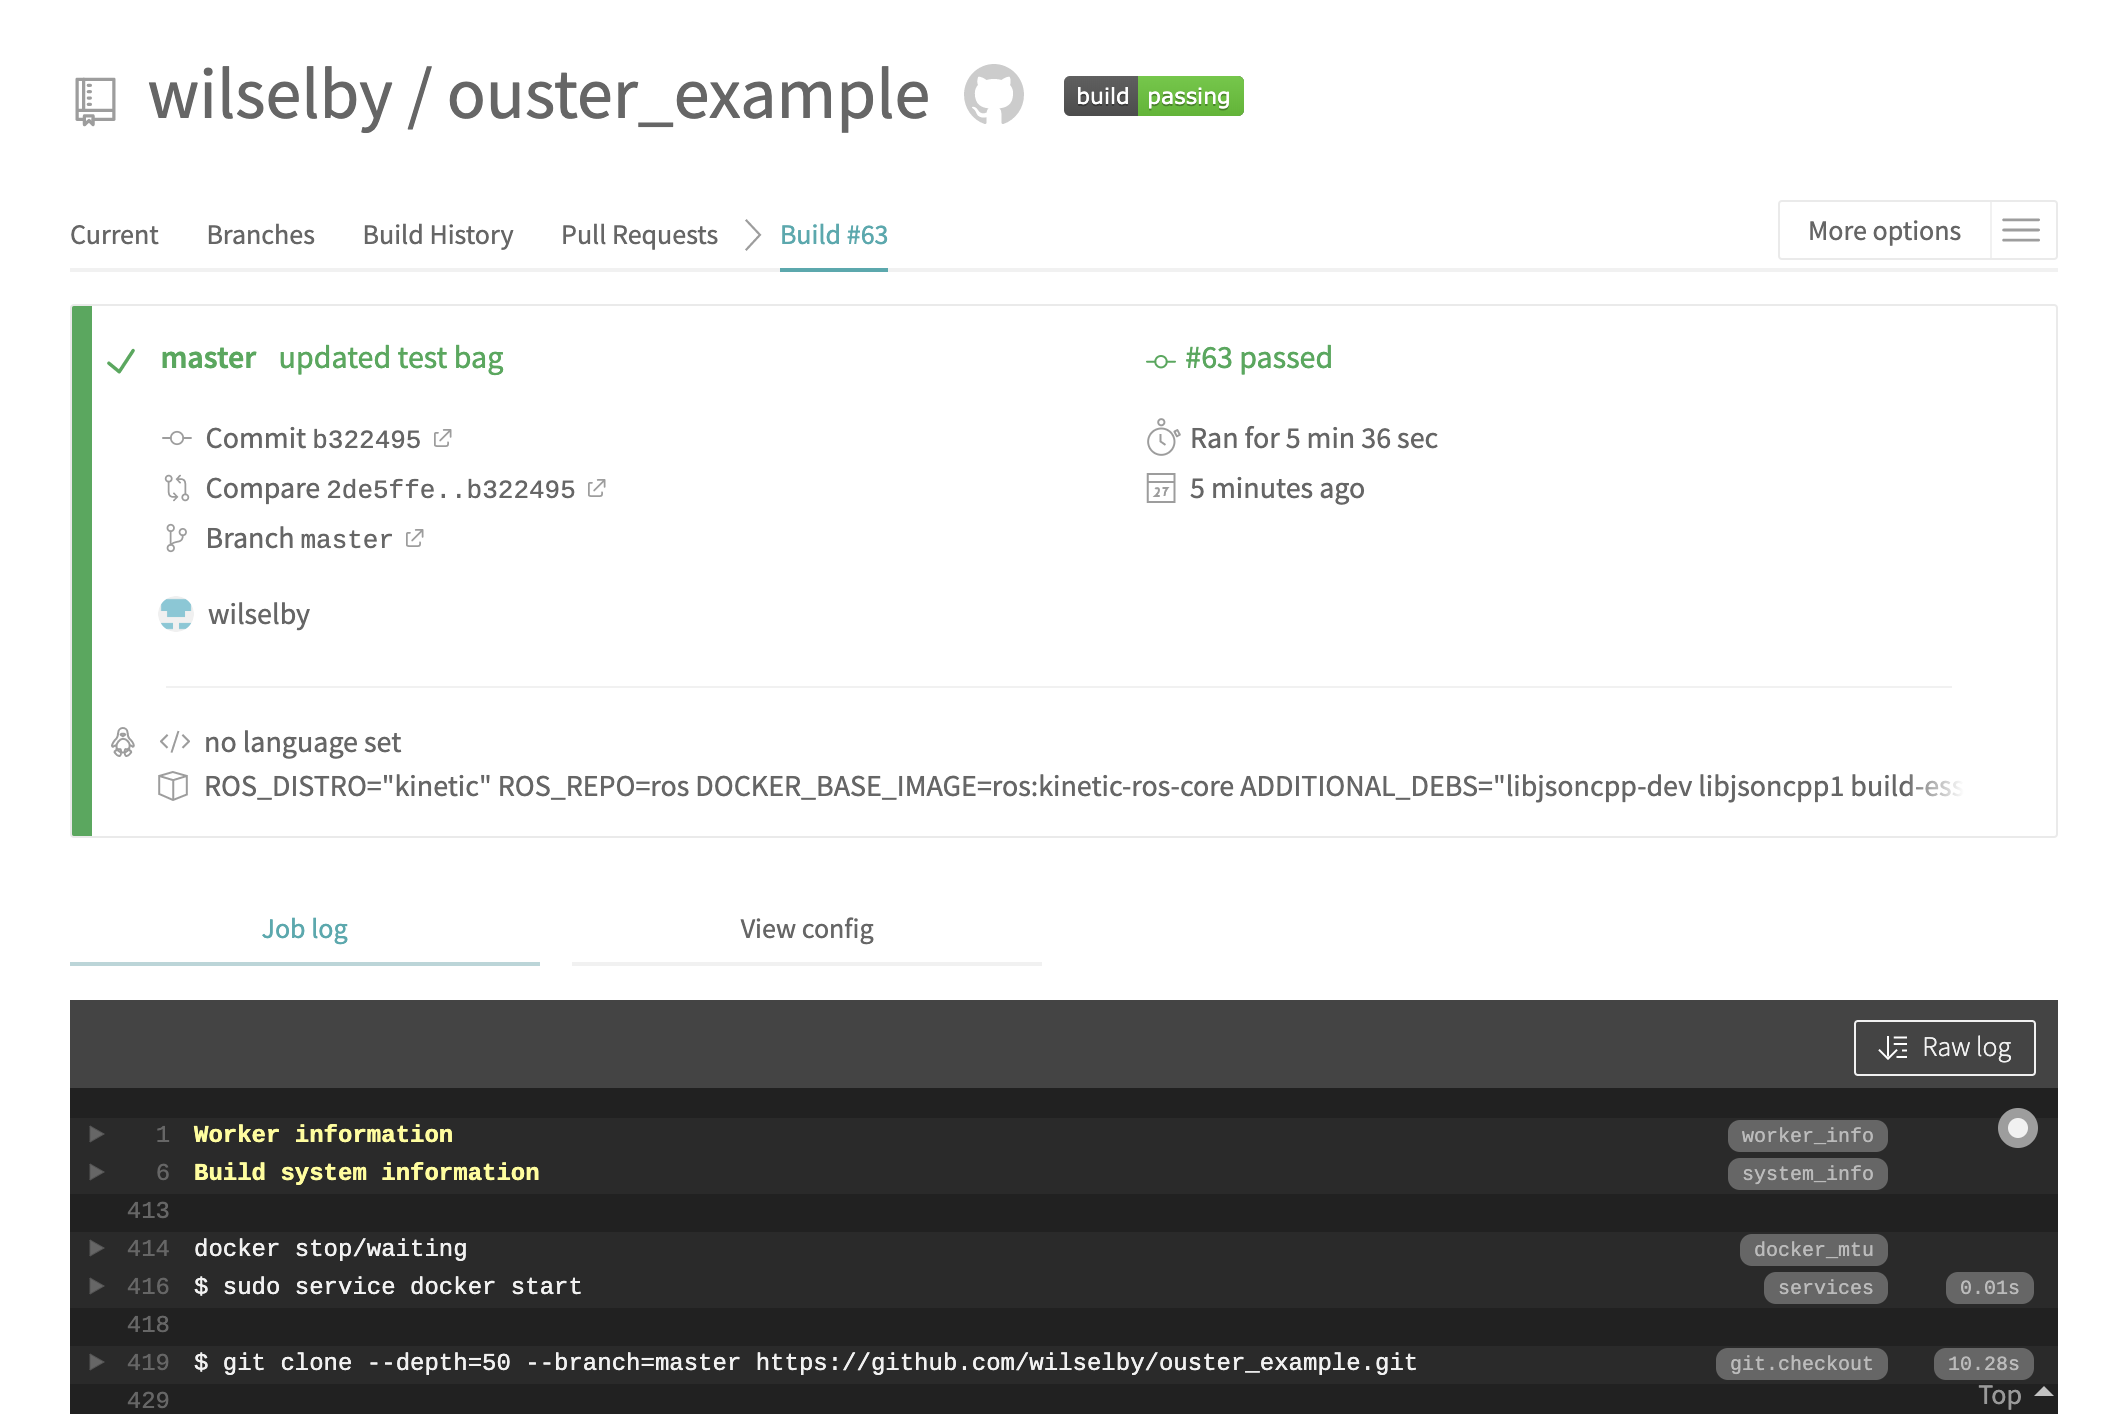
Travis CI has a variety of integrations for notifications. These are defined by the notificationstag in the .travis.yaml file. It’s also possible to view the status of each build on their website. You can view the status for the master branch, other branches, and for each commit.


You can also view the logs if a build fails:

Lastly, you can visualize the build status in the Readme page of the package. The markdown text below creates a badge that displays the build status of the master branch from Travis CI.
[](https://travis-ci.org/wilselby/ouster_example)
The badge is shown in the Readme below:
