

In November of 2018, Amazon announced the launch of RoboMaker, a cloud robotics service that makes it easy to develop, simulate, and deploy robotics applications at scale. RoboMaker provides a robotics development environment for application development, a robotics simulation service to accelerate application testing, and a robotics fleet management service for remote application deployment, update, and management.
RoboMaker extends the Robot Operating System (ROS) with connectivity to cloud services and integrations with various Amazon and AWS services. This makes it easy to integrate machine learning, voice recognition, and language processing capabilities with the robotics application. RoboMaker provides extensions for cloud services like Amazon Kinesis (video streams), Amazon Rekognition (image and video analysis), Amazon Lex (speech recognition), Amazon Polly (speech generation), and Amazon CloudWatch (logging and monitoring) to developers who are using ROS.
In this example, the code base used to simulate an RC car and Ouster OS1 lidar sensor in Gazebo and Rviz is modified to support continued development and simulation via AWS RoboMaker.
Getting Started in AWS
To take advantage of AWS RoboMaker services, it’s necessary to create an AWS account. These instructions detail the process of creating and activating an AWS account. When the account is created, the account is a root user account that allows access to all of the AWS services and resources in the account. AWS recommends that users do not use this account for everyday tasks. Instead, adhere to the Create Individual IAM Users practice.
Create an account with administrator permissions by following the instructions in the IAM User Guide, Creating Your First IAM User and Administrators Group. Signing in to the AWS Management Console as a IAM user requires a special URL. For more information, see How Users Sign In to Your Account in the IAM User Guide. For this use case, the IAM user needs read and write permissions to several services, including:
- Provisioning resources with AWS CloudFormation
- AWS RoboMaker
- Amazon S3, AWS Cloud9
- Amazon CloudWatch
Amazon S3 buckets need to be created as a source location for the robot applications and for outputs generated during the simulation job. Buckets can be created via the S3 dashboard. Source files are bundled with colcon into .tar or .gz files and uploaded to a bucket for RoboMaker services to access. Simulation outputs include logs, ROS bags, or other files specified in robot or simulation custom upload configurations.
Lastly, review the different pricing options for the various RoboMaker related services. Running this demo will incur charges on the AWS account.
Preparing the Codebase for AWS RoboMaker Requirements
AWS RoboMaker works with robotics applications built and bundled with colcon which is a replacement for catkin_make. colcon is a command line tool that automates the building and bundling of ROS applications. AWS created a file format called a bundle which is a single file format that can run in a local development environment and on the AWS service. For more information on the reasons why this was developed and details on the implementation, refer to the article, Building and Bundling a ROS Application for AWS RoboMaker on the AWS Open Source Blog.
In this example, the AWS RoboMaker development environment is used to build and bundle the application using colcon. For more information running colcon locally, see the documentation on installing colcon and using colcon to build and bundle. When migrating from catkin, there are several requirements that need to be met before using colcon to build and bundle a robotic application:
- all of the folders used by the application need to be defined in the
cMakeLists.txtfile - all of the dependencies need to be added to
package.xmland/or an includedrequirements.txtfile
AWS RoboMaker robotics applications use a directory structure that separates the robot application and the simulation application. This makes it easier to use in AWS RoboMaker simulations and other stages of robotics development. The robot application is deployed to the physical robot. Simulation applications are used to model aspects of the physical world. Using an AWS RoboMaker simulation job, robot applications can run inside of simulation applications and data can be collected and visualized.
AWS RoboMaker robotics applications usually have the following directory structure:


AWS RoboMaker Development Environment
AWS RoboMaker supports the creation of AWS Cloud9 development environments for robotics development. These environments are preconfigured with ROS and integrated with other AWS RoboMaker capabilities. This enables users to manage build configurations, create simulation jobs, and explore running simulations with Gazebo, Rviz, rqt and a terminal.
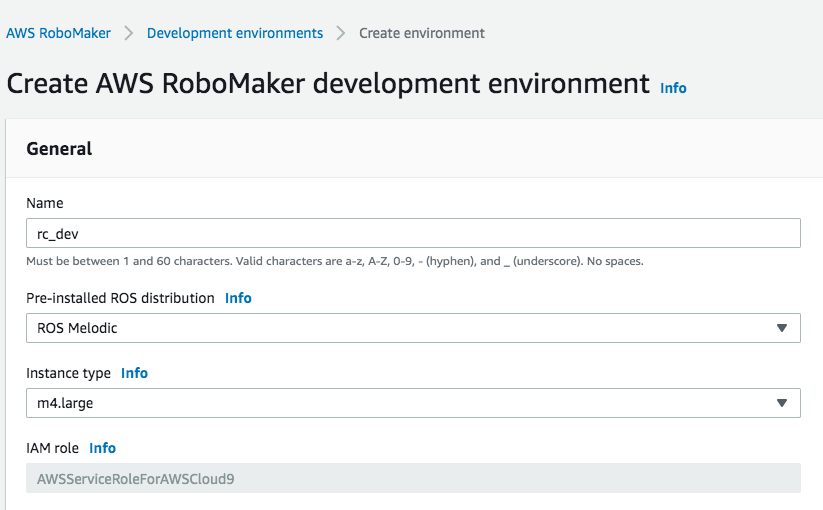
A development environment can be created from the AWS RoboMaker console via the “Development Environment” menu in the left hand navigation pane. After entering a name for the environment, select “ROS Melodic” as the Pre-installed ROS distribution. For the instance type, m4.large will work but smaller instance types are also compatible.

Once the environment is created, the environment can be opened via the browser. The environment has a large editing pane in the middle, a file directory structure on the left, a terminal at the bottom, and a top level navigation bar.


Updating the Codebase for a New Development Environment
The environment can be used to download the rc_car_robomaker repository. Via the terminal, download the repository by running
git clone https://github.com/wilselby/rc_car_robomaker.git
This downloads the repository into the environment.
The rc_car_robomaker repository contains the modifications needed to be compatible with colcon and aligns with the directory structure that AWS RoboMaker represents.
The development environment supports the execution of different workflows which can be used to build, bundle, and launch simulations. The workflows are defined via a .json file but they can also be updated via a GUI in the development environment.
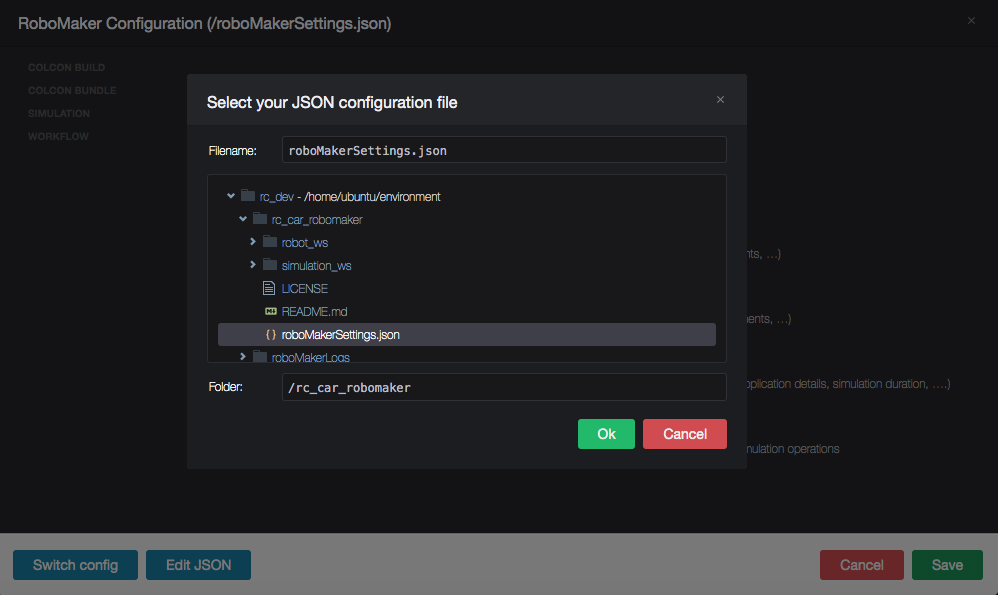
Inside the repository, the roboMakerSettings.json file needs to be updated to match the IAM role and S3 bucket names. The file can be loaded in the development environment editor and updated to match specific variables unique to each AWS account.
Under the “Run Simulation” section, update the following:
- “iamRole” with the IAM role ID
- “outputLocation” with the S3 bucket name for simulation job outputs
Under the “rover_sim” section, update the following:
- “s3Bucket” with the S3 bucket name for simulation job outputs
Under the “robotApp” section, update the following:
- “s3Bucket” with the S3 bucket name for the robot application.
Once the roboMakerSettings.json file is updated, the configurations can be loaded in the development environment. In the top navigation menu, select “Run” followed by “Add or Edit Configurations…” Select the “Switch config” button and chose the roboMakerSettings.json file from the repository. This will load various workflows for building and bundling the robot and simulation applications as well as launching a simulation.

Running a AWS RoboMaker Simulation
Once the workflows are defined, the applications can be built and bundled. Via the “Run” menu, under the “Workflow” section, select “Build and Bundle Rover” to build and bundle the robot application. This will open up new terminal windows with the output of the commands. The bundle command will download all necessary dependencies, create the .tar file, and upload it to the pre-defined S3 bucket. Selecting “Build and Bundle Simulation” will do the same thing for the simulation application. If any edits are made to the source files, they will need to be rebuilt and bundled before the changes are reflected in any downstream uses cases like simulation.
Assuming the source code builds and bundles without error, the system should now be ready to launch a simulation. The simulation can be launched via the “Run” menu by selecting “Launch Simulation” and then “Run Simulation.” The “Simulation” menu on the top navigation bar will update with the status of the simulation build. Selecting “View Simulation Job Details” opens up the simulation job overview in the AWS RoboMaker dashboard.
Once the status of the simulation transitions from “Preparing” to “Running” some additional functionality becomes available via the simulation details page.

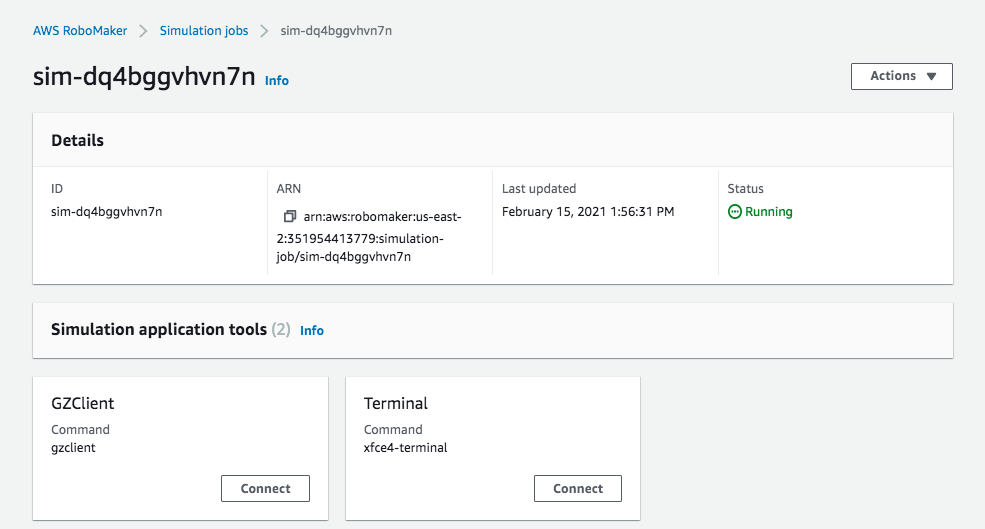
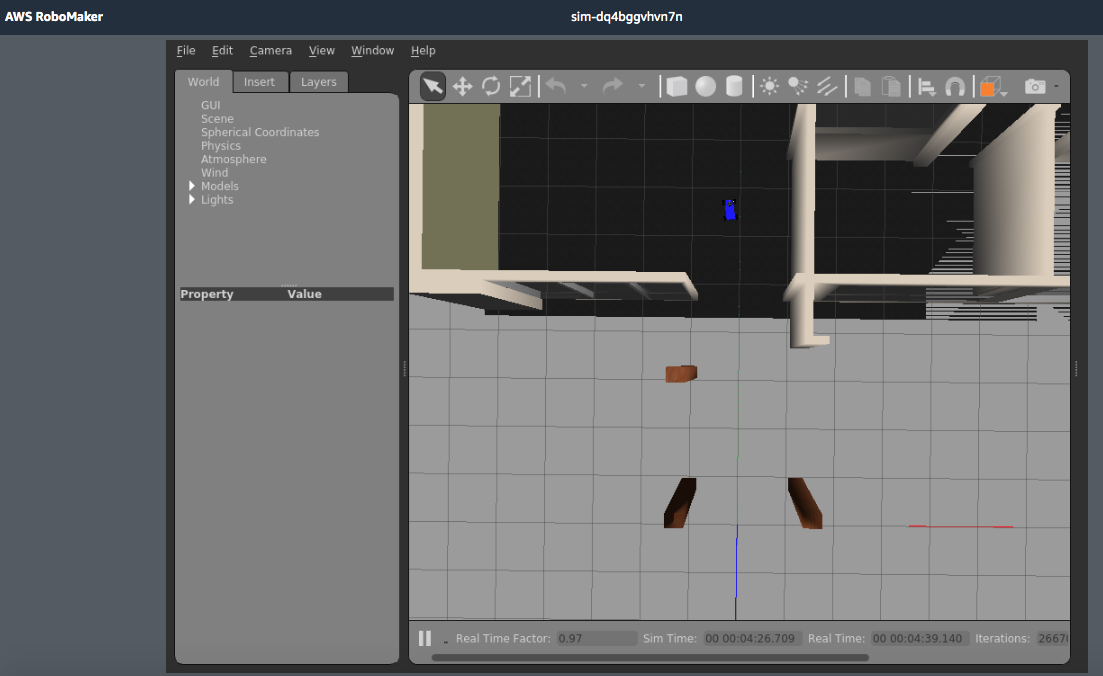
Clicking the “Connect” button on the “GZClient” widget will open up Gazebo in a new browser window. The WillowGarage world will load with the RC car near the entrance.

Clicking the “Connect” button on the “Terminal” widget will open a terminal window in a new browser.
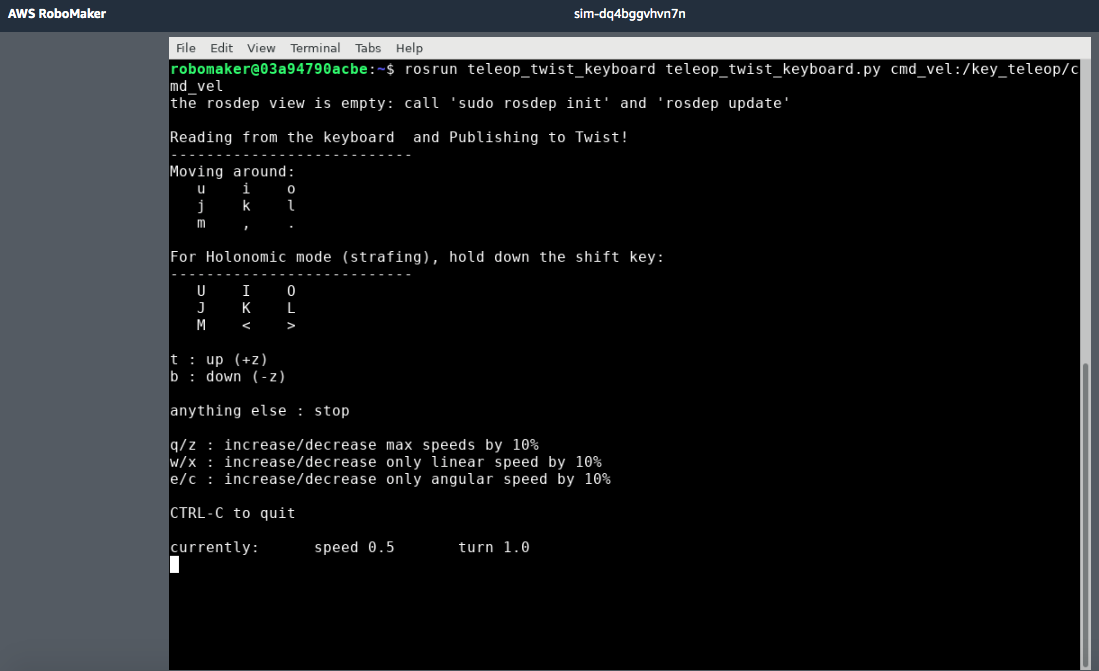
Once both Gazebo and the terminal are open, it’s possible to teleoperate the RC car. In the terminal, run the following command
rosrun teleop_twist_keyboard teleop_twist_keyboard.py cmd_vel:/key_teleop/cmd_vel
Following the instructions in the terminal, the RC car can be controlled via the keyboard.

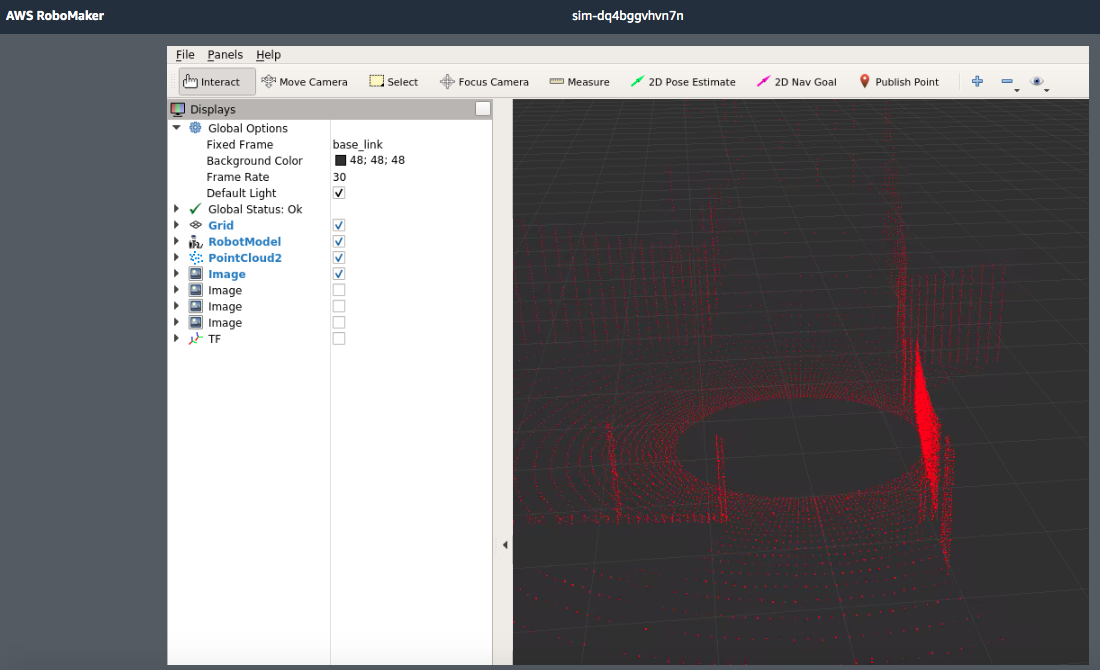
In order to view the simulated pointcloud from the Ouster OS1, launch RViz from the simulation details page. This will open RViz and enable users to add the pointcloud plugin. When the pointcloud plugin is properly configured to subscribe to the OS1 pointcloud topic, the pointcloud becomes visible in RViz.

Clean up Resources
To avoid extra charges, use the AWS Management Console to delete items that were created for this exercise. This likely includes
- Canceling the simulation job via the development environment or the AWS RoboMaker console
- Deleting the development environment via the AWS RoboMaker console
- Deleting the S3 buckets that were created to store the robot and simulation applications